Skip to Content

The Restoration Posts

Busy weekend

May 4, 2016 • jdonahue

I kind of have the days of the week designated for certain things. 5 days I work for money, or something related to that; Saturday is for rest, time with the kids, and fun stuff. Sunday afternoon is maintenance day.

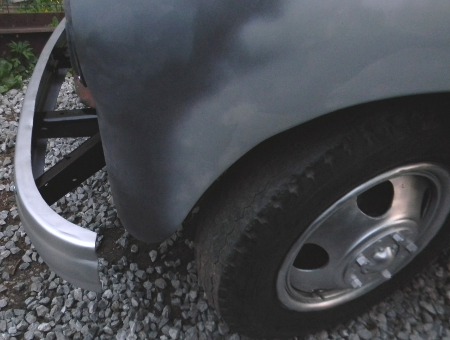
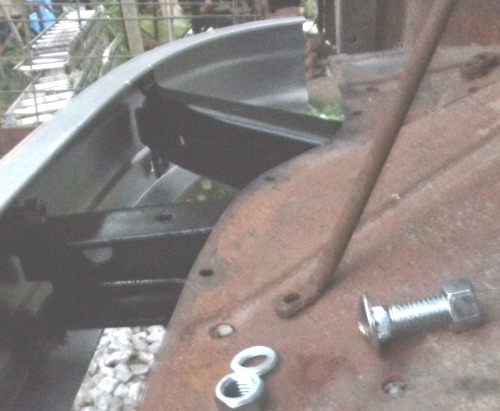
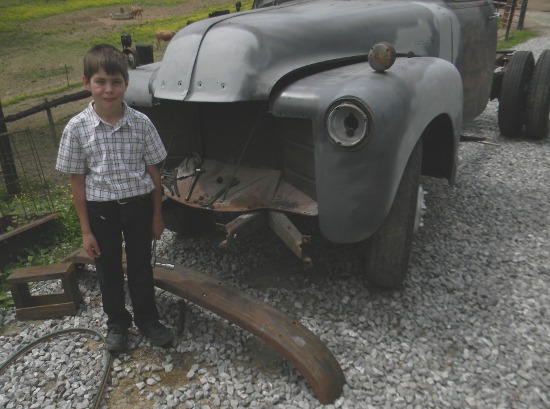
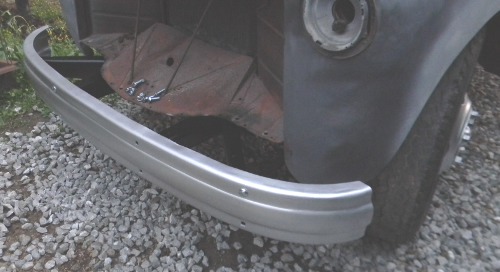
This last Saturday, my wife and kids went to help with a ministry that uses horses to work with inner city kids from troubled homes. She left the littlest guy home with me, because he was just getting over a slight illness, and she knew he would get tired too fast. A few days prior, I had finally received the special screws for my newly acquired jointer. I want to paint the jointer and table saw before I put them into use; otherwise it would be a long time before they ever get painted. But I knew that cleaning, masking, and painting the two tools and the bench would be way too boring for the little guy (Nolan), so I opted for removing the front bumper of the 1951 Chevrolet truck instead. I heated the nuts to orange hot while he watched and told me if I had done the other side enough. Then he helped use tools to remove the bolts and nuts. I also cleaned, primed, and painted the frame near the bumper, so that maybe I can leave the bumper on when I do the rest of the frame.
bumper_remvbumperFin1bumperfin2bumperFin3Think about the different kinds of metal, and the ways they are used in a restoration project like this. Steel is iron with varying small amounts of carbon added. Pure iron is actually the softest of the ferrous products. It’s used in the center of electric motors so that they don’t become permanently magnetized. Low carbon steel is used in places like the frame, and the sheet metal body parts. High carbon steel is used for leaf springs, which, if taken from a junk car, can be used to make knives. The vehicle also contains Chrome, and copper.

The Bible, in the Book of Romans, says: “For the invisible things of him from the creation of the world are clearly seen, being understood by the things that are made, even his eternal power and Godhead…” As time goes by, I am increasingly worshiping God as I work with all the different metals, woods, and other materials He has made. Sometimes I refer to Him as “The envy of the artists”. We are continually walking through His art gallery.

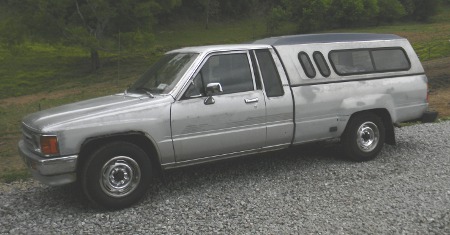
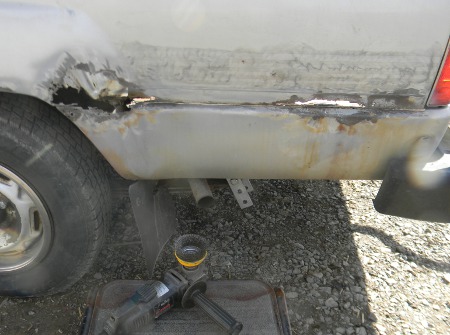
Here’s are a few pictures of body work on the 1987 Toyota truck. In an earlier post, I talked about a tool I made, to put a flange on the edge of sheet metal; so that there would be a step down, which make room for additional sheet metal, rivets, and bondo. As it turns out, there was already a tool like that. It’s called a Flange Tool. I got one at Harbor Freight; and it works great. Look closely at the picture of the front fender, and you can see the flange there. The back fender is coming along, this area used to have lots of big rust holes.
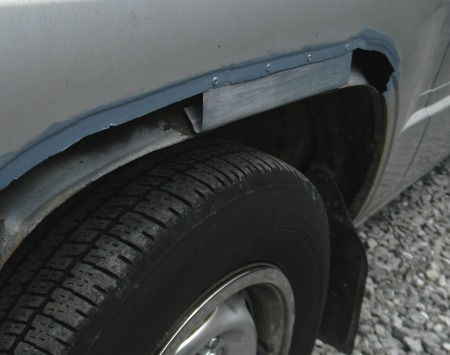
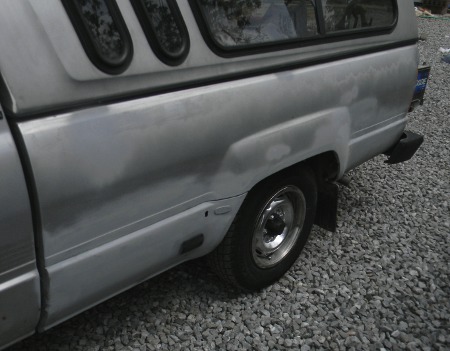
bodyProgr2

bodyProgr My wife was able to get some nice, real hardwood flooring to use in the bathroom. So that will be a house restoration project. The first thing to do for that project was to make a composting toilet, which will be used in a sectioned off area of the old corn crib, in the barn. This house is probably 100 years old, so there’s no telling what odd workmanship we’ll encounter as we take on the flooring project, so I want an alternate toilet. The container is a blue drum cut in half.
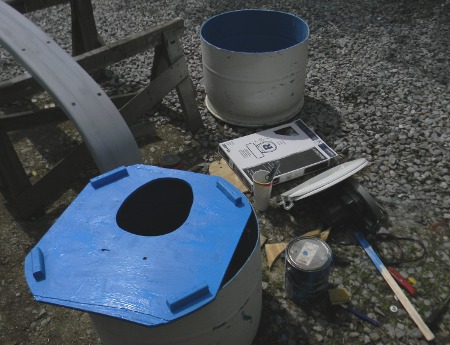
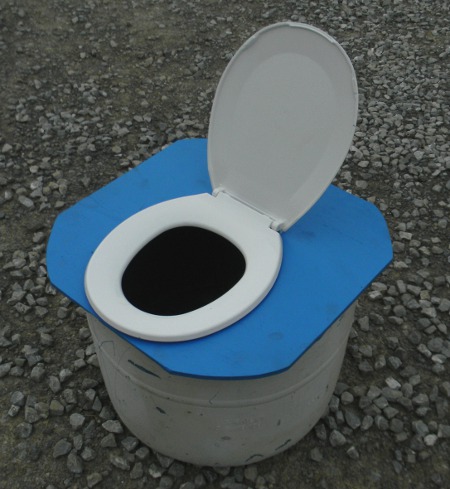
compToilet_1compToilet_2In a previous post, I showed how we restored a metal cart. Here’s a picture of the children playing with it. They devised a front axle, so it’s easier to pull and push around. They use it for work too.
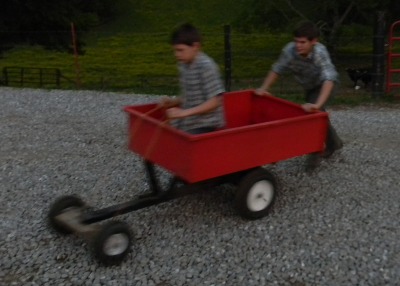
yardcartFinally, as the daylight was ending, we got one of our world’s best cloud shows, just before it rained. The sun was setting in the west, but this cloud was in the south. The next picture is facing southeast. The next picture is facing west. Finally, it all ended. More pictures of this can be seen at my regular blog, as soon as I make a post there.5_1_16sky_25_1_16sky_45_1_16sky_115_1_16sky_12

Incremental learning

April 29, 2016 • jdonahue

I guess life would be boring if it weren’t so complex. I don’t mean that everything is difficult, but that the things we enjoy have variety through complexity. Capability too. The things we take for granted are the result of years of development, the latest model was designed by somebody who “stood on the shoulders of giants”.

I’m involved in a lot of things, maybe too many. My trade is perhaps the most diverse in the world.  I’m an old school sign painter, which if I let it, would incorporate these things in their advanced stages: woodworking, metal working, art, typography, advertising, computers, plotters, pinstriping, sculpting, theme park work, silkscreening, neon, electrical signs and controls, cartoons, automotive painting, and other stuff I’m sure. Each of these things requires a bit of ongoing leaning, and gets fun when you tie them together. For instance, I like to hand draw artwork for my own clip art. I make it into a vector file that can be enlarged to any size, and used in a plotter to cut vinyl graphics, or on an engraving machine or embroidery machine.

One of the subsets of painting is restoration; and the tools used therein. In the last couple years, I’ve discovered the practicality of wire brush wheels on a 4 inch angle grinder. The wire wheel comes in two basic variations, which makes for  four types. There’s flat shape or cup shape, there’s braided wires, or straight wires. From my experience, the braided flat wheel is the most aggressive, and the unbraided  cup shape is the least aggressive. Only recently have I started to think that there’s value in the softer model. Before, it was just a slower way of cleaning things. And clean it does. If I can put a video in a hosting directory, or open a utube account, I’ll edit this post with a link to a video I made of big steel push rods on a steam locomotive being cleaned with a wire wheel.

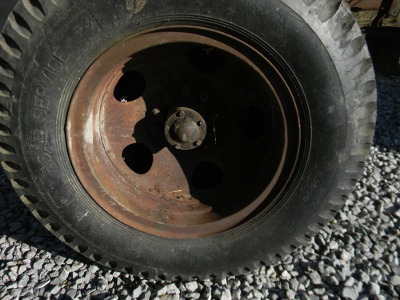
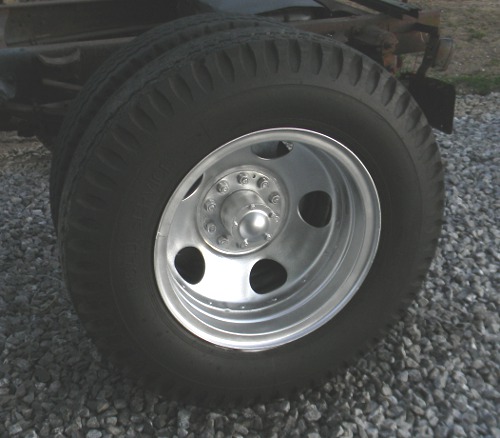
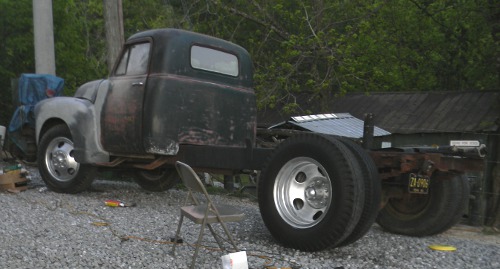
So I was doing a couple restoration projects on Saturday; my 1951 Chevrolet truck, and a metal lawn cart with the kids. SEE HERE. First, I was doing the body work of the Truck. I remembered that the unbraided wire wheel works for removing vinyl stickers from a car finish; so I wondered if it work to clean the old truck tires. These tires had this permanent tan colored grunge look. It wouldn’t scrub off. A more aggressive wire wheel would tear up the rubber tire, but the softest cup type didn’t. It got around the raised letters without damaging them. the results were pretty good compared to the grunge look.

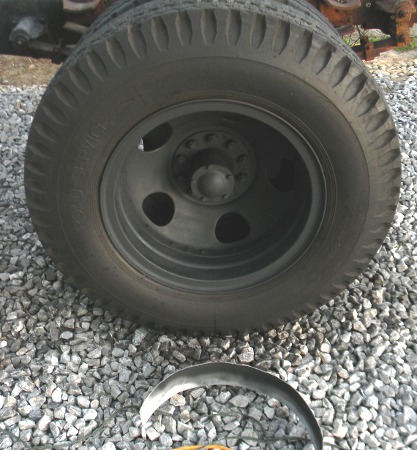
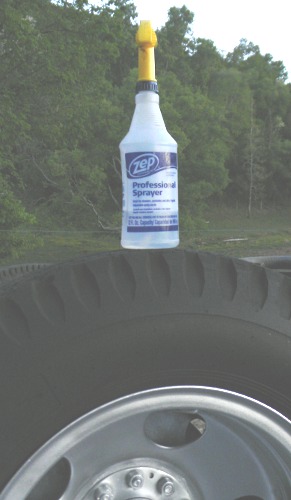
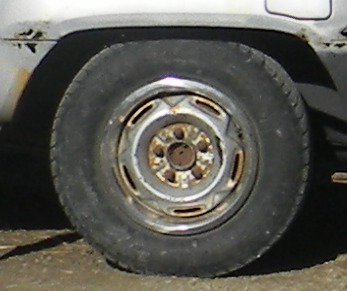
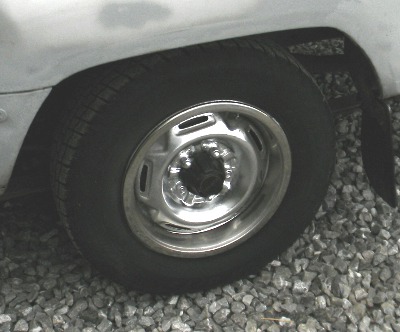
Then I went and worked on the cart project. The last step was to clean up the tires. I grabbed the closest cleaning product, which happened to be Zep Fast 550. It cleaned the tires very well, and I wondered if it would work for -really- old tires. Below are some pictures, but as is often the case, the lighting hides part of what you want to show. So it is, these tires looked worse than they do in the first picture. The second picture is black primer, and there’s an aluminum strip in one picture, it’s REALLY handy for keeping paint off the tire. I liked the results so much that I did all 4 wheels on my Toyota truck.

In the book of Isaiah, chapter 28, it talks about incremental learning. Here’s what it says:

9 Whom shall he teach knowledge? and whom shall he make to understand doctrine? them that are weaned from the milk, and drawn from the breasts.4 10 For precept must be upon precept, precept upon precept; line upon line, line upon line; here a little, and there a little

The Bible always has some new thing to learn; relevant things. Right now I’m learning about the word “stumblingblock”. It’s a Biblical term about people who have a warning, but disregard it. Good stuff, very relevant to these times.

tire_1tire_2 tire_4tire_3Zep_1ToyotaWheel_1ToyotaWheels2ToyotaWheels1

His Joy…

April 3, 2016 • jdonahue

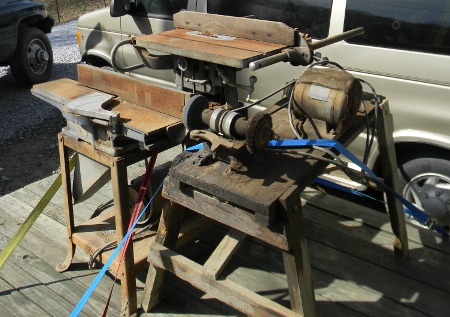
I have a number of very satisfying restoration projects going on right now. Here’s one: I was given several old power tools, because the owner figured I would restore them. They were in his family. They are well made, and I was glad to get them. I actually have them already, but mine are problematic; these will be a nice replacement. Here’s a picture of them before I took them off the trailer. TableSaw1  What you’re seeing are two benches. The closer one is wood, and has a motor and grinder mounted on it. The second one is steel, it has a jointer on the closer end; and a table saw on the end closest to the gold van. The lower shelf has a large electric motor.
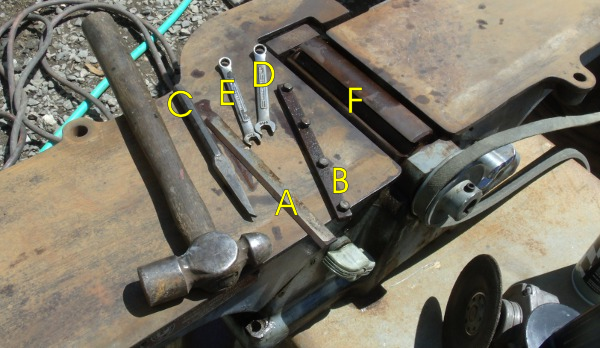
I removed it from the trailer, and started working on the jointer first. It’s used like a planer, except that it makes the edges of boards true, so that they can be fitted together nicely. The tool has been out in a barn for awhile, and I encountered problems right away. Last weekend,I was using spray lubricant generously, but several parts would not become free from the rust that held them. These parts weren’t easy to get to, and would have caused some problems if I hadn’t got them resolved today.jointerHere’s what was difficult: All these tools and parts are setting on half of the jointer top, This half raises and lowers at an angle, The places where it contacted the jointer body were rusted together. After setting a week with penetrating oil, the parts became free, and will now move as needed. I’ve never had good results using the oil this way, until today.
Parts A is one of three cutting blades. They are held into slot F by pieces like B. Obviously, there are 12 little bolts that need to be loosened in order to get the blades out. Unfortunately, 10 cooperated, 2 did not. These two seemed to have a smaller head, and I rounded the corners on one bolt head trying to loosen it. That’s bad news because they’re all positioned down in slot F, and only an open end wrench will get in there. The 10 came out with a 5/16ths wrench. I even made a smaller wrench from an unused 7mm wrench. I made it so tight that it had to be put on with a hammer. It still didn’t work. At last, I tried using this odd chisel like tool, C. I put it on a corner of the bolt head, and tapped on it with the hammer, in a counter clockwise direction. It worked, and the threat of using harsher methods was gone. Not only that, but I can go to the next steps, which puts me close to using this tool.

That was a very good start to my Saturday. It got better. My son helped me go get an older air compressor, which will be a benefit around here when it’s restored. After a few more projects, I had one of the best Saturdays I recall in quite a while. Imagine how the Lord feels when a person repents, and makes progress in learning and living more for Him. Below is a well known Psalm, sometimes used at funerals; but consider it in the context above.

A Psalm of David. The LORD is my shepherd; I shall not want.  He maketh me to lie down in green pastures: he leadeth me beside the still waters.  He restoreth my soul: he leadeth me in the paths of righteousness for his name’s sake.  Yea, though I walk through the valley of the shadow of death, I will fear no evil: for thou art with me; thy rod and thy staff they comfort me.   Thou preparest a table before me in the presence of mine enemies: thou anointest my head with oil; my cup runneth over.  Surely goodness and mercy shall follow me all the days of my life: and I will dwell in the house of the LORD for ever.

425 Horse power from 1967

March 18, 2016 • jdonahue

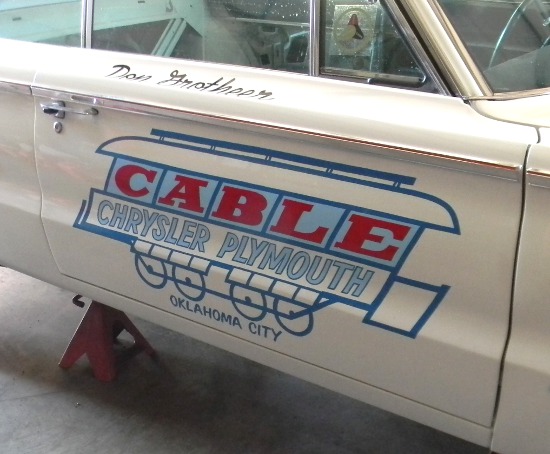
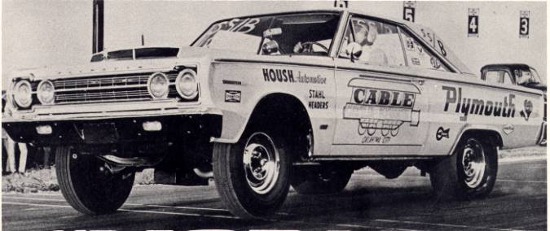
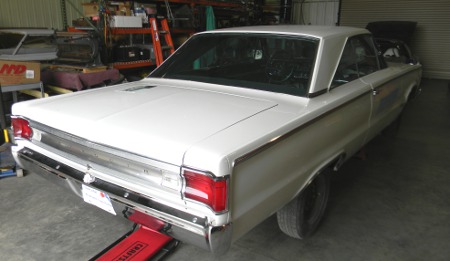
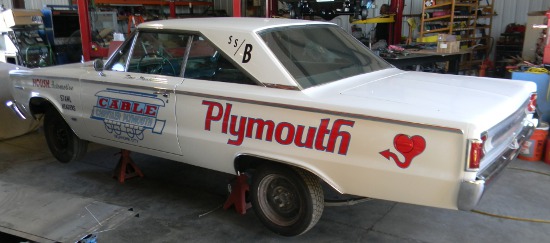
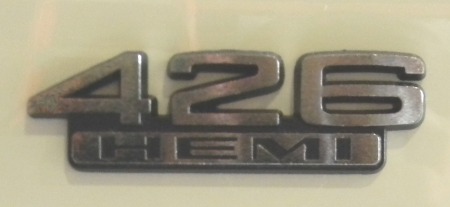
Every once in awhile you get a really memorable job. I have a couple of those right now, this one I just finished. It’s a 1967 Plymouth Belvedere with a 426 cubic inch hemi engine. In my younger days, I was involved with hot rods, so were my friends. We knew what a 426 hemi was, but none of us could afford one. So it was a pleasure to get a call from Chuck at Chuck’s Classic Cars about restoring this car. This is the actual car, and Chuck knows Don Grotheer the driver. In fact, he let me talk to him on the phone. Some days my work is quite trying, other days, it’s incredible. To get an idea of the caliber of the work in Chuck’s shop, click on the link. If there’s an applicable Bible verse, it’s probably Proverbs 22:29, “Seest thou a man diligent in his business? He shall stand before kings, he shall not stand before mean men.”

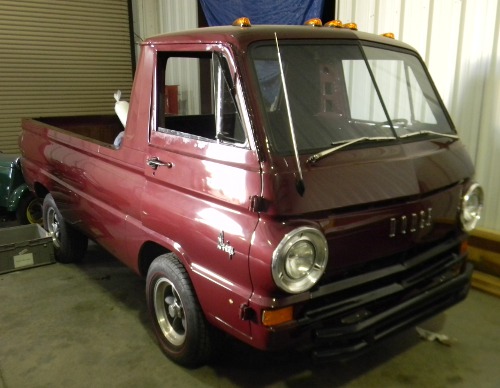
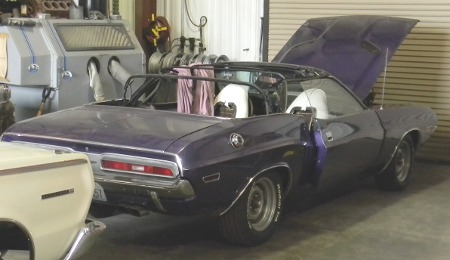
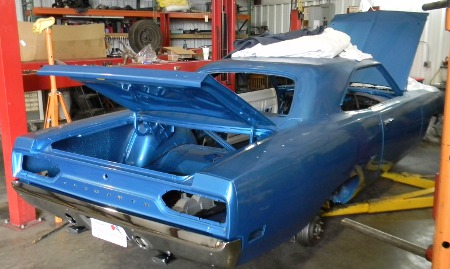
The lettering was hand painted back then, and he wanted it done that way again. Below are pictures related to this job; the first being an old photograph from the car’s racing days. The other pictures are cars around Chuck’s shop, some are rare. Some of these cars were ordered from the factory with the famed 426 engine.

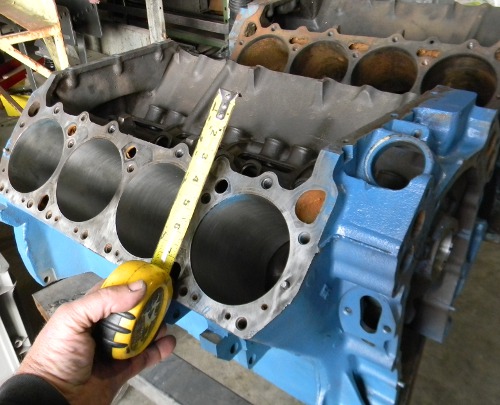
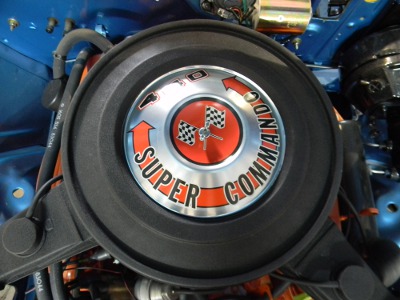
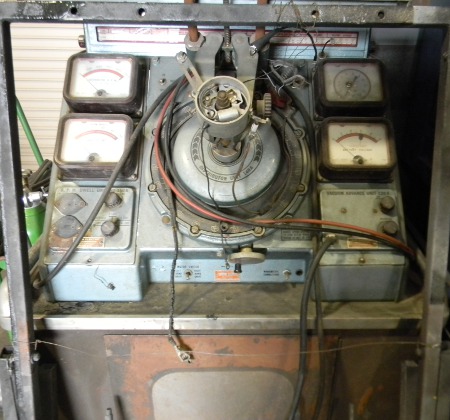
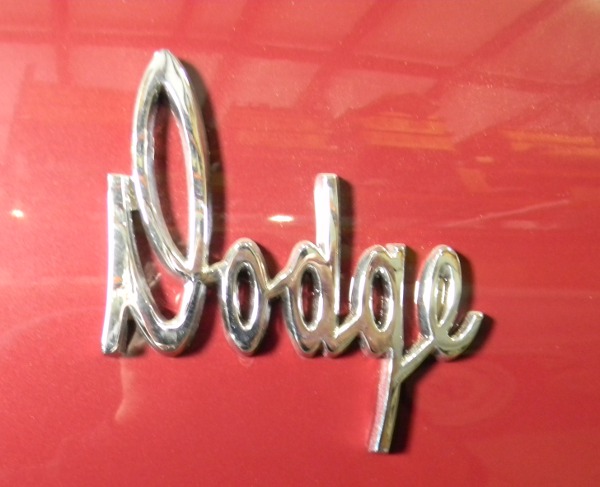
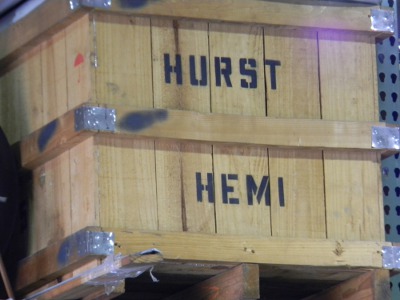
A job like this is more time consuming than other jobs because I take photographs which were shot at an angle, and do my best to relieve the foreshortening effects. It not only makes graphics narrower horizontally, but changes italicized angles. All this is done with the help of a computer, because it’s great for using actual measurements to undo distortions. The time I put into drawing the graphics on the computer is the same or more than I would use if I did them completely by hand; so I think that it’s safe to say the outcome is the same. Also, I use the same tools and methods for painting on the car that were used in that era, for authenticity. There are probably more brush marks now than then, because back then the paint contained lead, and could be thinned down. The thinner paint laid out more smoothly than what I use now; which is the same brand name, but a lot less thinner, plus a hardener added to preserve it from the sun. I really don’t mind though, as this will make the hand painted effort and expense show more to observers at shows. Anyway, here are the pictures:Belvedere_DGbelvedere_beforeCable_fini_2cable_finiSome info about the rest of the pictures: The blue car is a Super Bird in progress, there’s a Challenger, and a beautiful Dodge truck. The engine block is a 440 cubic inch block, typical of police car motors back then. There’s a distibutor rebuilding machine, and a hemi in a crate. The complete 440 engine is in the Super Bird. 426_Hemi440_bigBl 440_enginedistrbtrDodge_emblmDodge_redChallengerHurst_HemiSuperBird
 

Needed smaller tool box…

February 15, 2016 • jdonahue

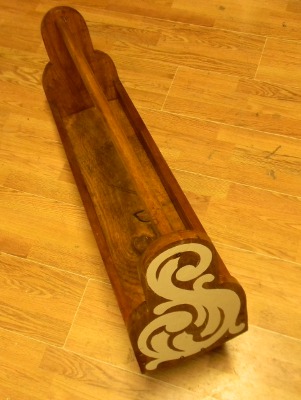
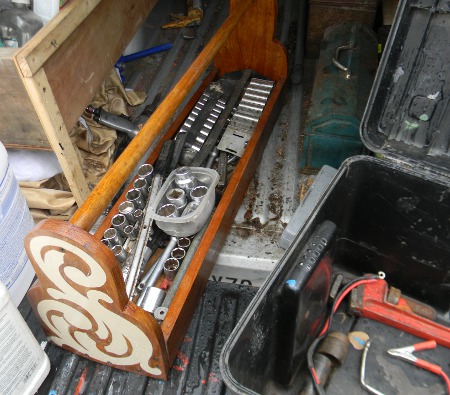
I had this large black plastic box on the bed of my 1978 Toyota flatbed. The box is just a cheap Wal Mart type, But I was very impressed with how well it worked and survived outdoors. It carried a heavy load of tools in all weather, never leaked. It was given to me, and I never considered it secure; but people usually leave my old stuff alone. I used it primarily for socket and ratchet type tools. When I transitioned to the 1987 Toyota, it took up more space than is necessary. By making a smaller box, I can carry more firewood or other bulky things. Here’s a couple pictures, but a more detailed page can be seen here: Father and Daughter project.

toolBox4TruckTools2

Back to work…

February 4, 2016 • jdonahue

The faux rivets were a fun experiment, not only that, but they looked good the next day. Sometimes, on the previous night, I’m near sleepless over how cool an idea is. This one I regarded as practically the VEHICLE GRAPHICS COUP OF THE CENTURY! Then, the next morning I’m thinking “WHAT???” I did WHAT???

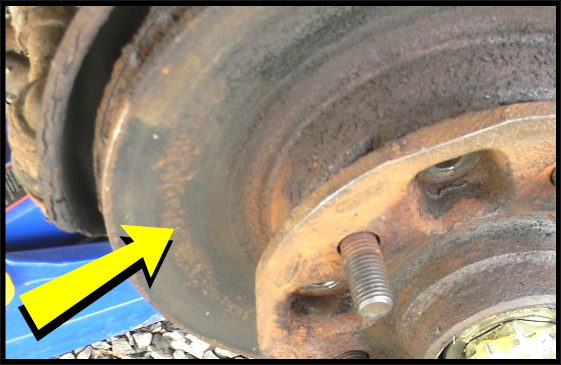
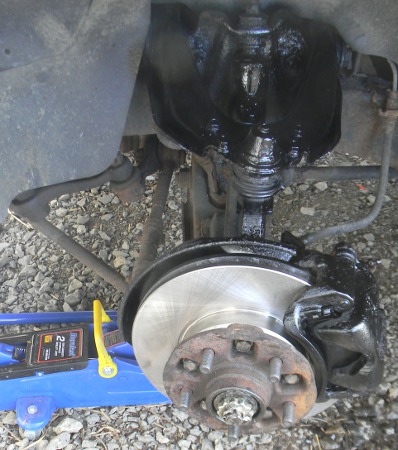
But it was still cool the next day. But it was only an experiment of something to do later. Over the weekend, I did two things at once. I had help anyway. I taught two of my sons how to change the rotors and pads on the front of the Toyota truck, while I did a body work experiment on the back. Each boy did one side, I paid them $10 each. It didn’t take very long, and was a good way to learn a task. I was nearby to answer questions. The brakes really needed work; the passenger side pads were cracked. Both sides had pitting on the rotor, which also looked worn down. I figured that the pitting made less flat area to brake against. See yellow arrow. The second picture shows the new rotor and pads, along with paint on the upper control arm. I cleaned the parts well, but didn’t disassemble anything to paint. No relevant verse came to mind for this project while working on it, but not taking it apart reminded me of a story Jesus told about an enemy sowing weed seeds in a farmer’s wheat field. By the time it was obvious, ripping out the weeds would have damaged the good plants. So the farmer told his workers to leave them together until harvest. The story is about different kinds of people in world. The tares get put in bundles and burned.

I found that parable in the Bible very fast with “The Word”, awesome free Bible software.

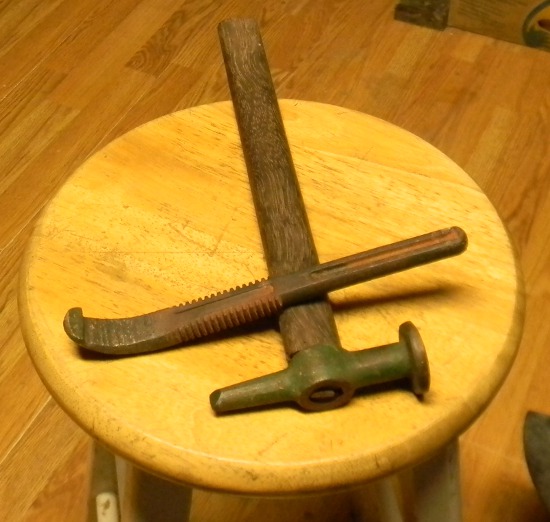
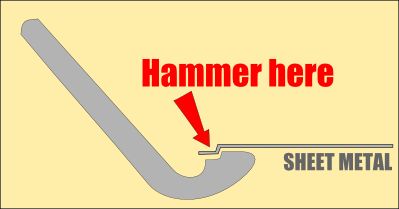
brakes1brakes2 The body work involved an experiment I’ve been thinking about for a few months. I wanted a steel tool that was sort of hook shaped, with a step like drop on the upper surface. The idea being to put the hooked part just inside the edge of a hole on the body. This is after the area has been cleaned and painted inside and out. Regardless of what people say, properly treated rust won’t continue to spread, if you keep the oxygen away from it. Air and water are oxygen sources. Anyway, I also made a small straight peen hammer. The hammer is used to hit the sheet metal and make it conform to the step part of the hook tool.
Maybe I should back up a bit. I’m not a body expert by any means, but I can barely do my own projects. Trust me, sheet metal and body work is a mysterious art form. If someone quotes a hefty price for it, there’s a reason. I’ve done this replace sheet metal without a mig welder thing before.  If you put the new metal on top of the existing body, then you not only have the metal sticking up, but the rivet heads too. They make a two part body glue to replace welding, but it costs more than I wanted to pay. Then you have very artistically feather the body filler you applied over the rivets out very gradually, sanding ever so carefully until a shadow of the rivet starts to appear. Even if you get it nice, looking along the length of the body, this sort of repair can still show the patch.

So the big idea here is to lower the new metal, rivet heads, and body filler lower than the surface of the existing body. Very little feathering required. It looks like it works well, but I’ll have to post some better ‘after’ pictures later.

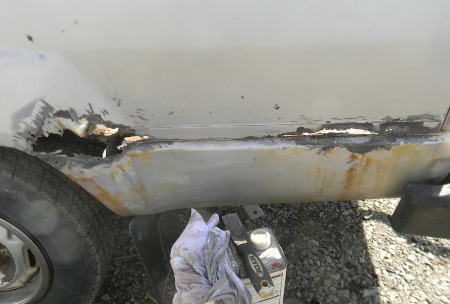
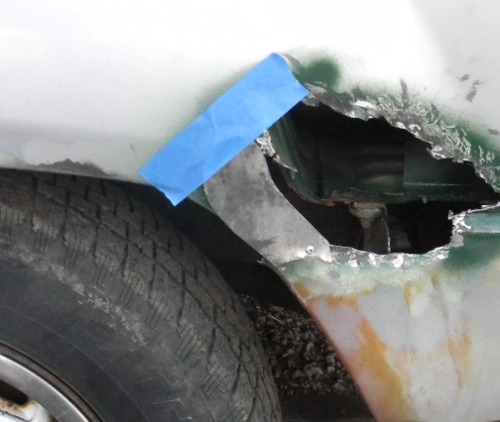
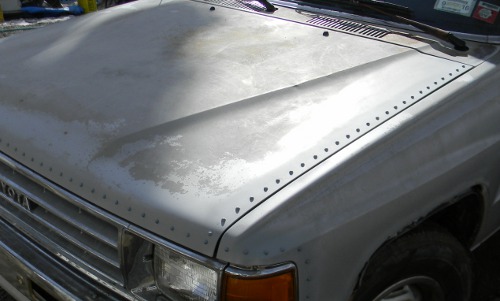
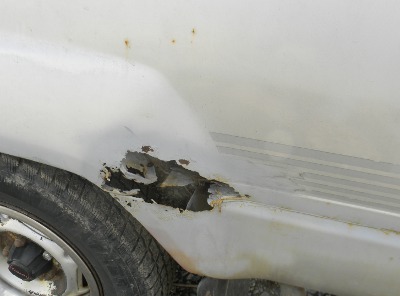
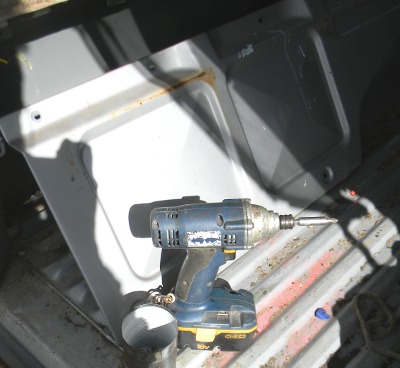
The first picture is the hole, with dried primer around it. Looks more civilized driving around with that than brown rust.  The next picture is removal of the inner panel to get access. Leaving the backside unpainted would make this body project a waste of time. One nice thing about this method is that I can lay a good coat of paint on the back side of the new metal; and nothing gets burned off by the heat of welding. The third picture is the outside area after going over it with the 4 inch angle grinder and wire wheel. Again, this tool (bottom of the picture ) is indispensable. It also shows the factory vinyl stripe graphics after hitting them with the wire wheel. That worked great, vinyl graphics can be a royal pain in the neck to remove. The next picture shows the residue of the graphics cleaned off with strong solvent and a cloth. The next picture shows the first piece of new metal being attached. The green paint is fresh, but ignore that. I used more than one piece to help with the shape. The last piece shows the tool I made, and the hammer I changed to straight peen. The Info graphic explains the tool better. Now that I’ve made, it, I have several improvements in mind, but that will have to wait.hole1hole2hole4hole5hole7hole8bodyTool

You’re allowed to have fun…

January 25, 2016 • jdonahue

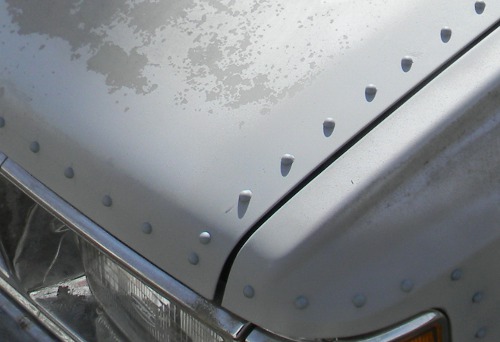
Years ago, I had this idea of making faux rivets as part of a vehicle graphics scheme. I was going to use a round mask and an airbrush. Now, I’ve decided that fake plastic rivets would be better looking. I got these at 30 for 69 cents; they’re probably Teddy Bear eyes. I sanded the backs and glued them on with waterproof adhesive. I haven’t finished the other body work yet, but I was itchin’ to see how this would look.

Over the years, I’ve had fun with different graphic schemes on my own trucks. It goes against some people’s view of what conservative behavior is; but I say that they need to be careful that their traditions haven’t replaced the teachings of the Bible. That’s actually a dangerous practice that’s easy to be in.

Info update (from a discussion at a sign forum): Dianne, the first thing I did was to take steel wool to the existing paint on the truck. I sanded the back of each half bead, then used Goop brand plumbing adhesive. I hope it works; they seemed on really solid. I had to test that because the next step was to take a small wire brush to the tops. Everything must have microscopic scratches in order for paint or adhesives to stick to the previously glossy surface. It was a lot faster to wire brush them after they were glued on. Then I sprayed them with grey primer, which is surprisingly similar to the aged silver paint.
Getting a system down is obviously important, the slowest part is picking up each half bead. They’re only 8mm wide, and I guess all the restoration work I do makes my hands a bit coarse. Anyway,what I’m contemplating is a small box, no top, 3 sides. Maybe a grippy type floor, something rubbery. That way, I can shake the box full of half beads side to side, and some of them will turn over, with the flat side facing up. They’re a lot faster to pick up that way.
It might also help to have a flexible pre-marked tape like tool. That way, I wouldn’t have to look for 1 and a half, 3, 4 and a half, 6, etc. Not a huge time saver, but everything helps.

fauxRivets

fauxRivets2

Progress, inside and out…

January 19, 2016 • jdonahue

First off, the Toyota truck runs great. The previous owner must have put a new muffler on it, it looks like one was welded on, plus, it’s quiet. The truck is so smooth, I doubt it was smoother when new. Everything in the cab works. door locks, dome light; and the heater, man does it work. On the lowest setting, I have to alternate between off and on, because constant on is too hot.

So, I’ve been driving it, but a few days I had this emergency mental note: CHECK DIFFERENTIAL OIL NOW! The differential cover looked as bad as everything else under the truck. Maybe it had an aftermarket undercoating applied, but whatever it is, it has a 100% fail rate. The entire underside of the truck looks like major flaking metal. Turns out that it’s not metal, but this coating, with rust underneath. I didn’t want the flaky stuff falling into the oil.

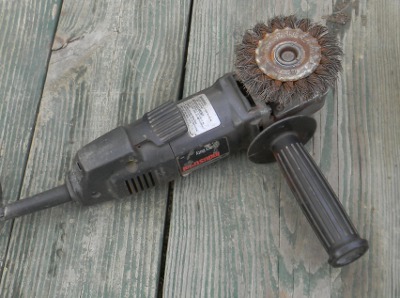
In the picture below, you can see a 4 inch angle grinder with a wire wheel attachment. As a note, you cannot be serious about DIY build and fix projects without one of these tools. Get one with a 5/8″ arbor; you’ll have an easier time getting accessories. The wire wheel attachment cleans some things like no other tool. I own a number of different tools, and that combination is way out front of other power tools in some situations. It’s faster than sandpaper, usually doesn’t scratch like sandpaper, and there’s realistically no other way to do things like old style rivet heads.4inchWireW

Below, you can see the differential cover after the wire wheel treatment. Should have taken a ‘before’ shot; I’ll do that on some other part. There’s a pile of metal pieces from a cubicle divider section that I disassembled. I wanted thin sheet metal with bends in it, man did I get my share. The divider thing is quite well made. Layer after layer of different kids of insulation. Sound barrier I guess. Anyway, if You don’t own a metal brake (large heavy shop tool for bending nice corners in sheet metal) you’ll start having an eye for scrap pieces with nice bends. In one of the pictures, I’ve laid one of the pieces next to the tailgate that I want to fix with it.differentialcubicle1cubicle2

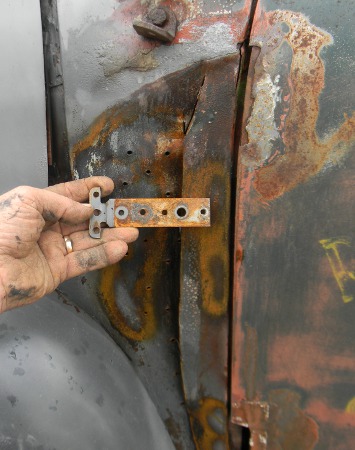
What’s interesting is that just a few days prior to disassembling the divider, I figured out a way to fix a very bad crease/dent on the 1951 Chevrolet truck body. It looks as though somebody was driving in reverse with the door open, and the door snagged on something, leaving a 3 inch deep dent the height of the door below the window. The dent was pushing against the door hinges, interfering with them. So I took the 4 inch angle grinder with a thin composite metal cutting blade; and cut up the length of the dent, right in the center. I pulled it out -some- with a dent puller and channel locks, but one side is still way down. I figured I needed a stout piece of steel with holes in it. I’ll lay it across the dent, and then use long self drilling screws to grab and pull the lower side of the dent up to the other side. The metal has stretched to the point that there’s a significant overlap, even after losing the cut kerf. Then I’ll wire weld next to the metal with holes, and move to new place. In with the other pieces of metal in the cubicle divider was the piece with holes that i needed. Looks a bit like God’s providence.cubicle3

Here’s a picture of the resident Tom cat wanting his ears scratched. A Bible verse relevant to fixing the underside of the vehicle, not just the top?…maybe Psalm 51:6: “Behold, Thou desirest truth in the inward parts…” “Thou” being God, who wants truth in our hearts.meow

First things first

January 14, 2016 • jdonahue

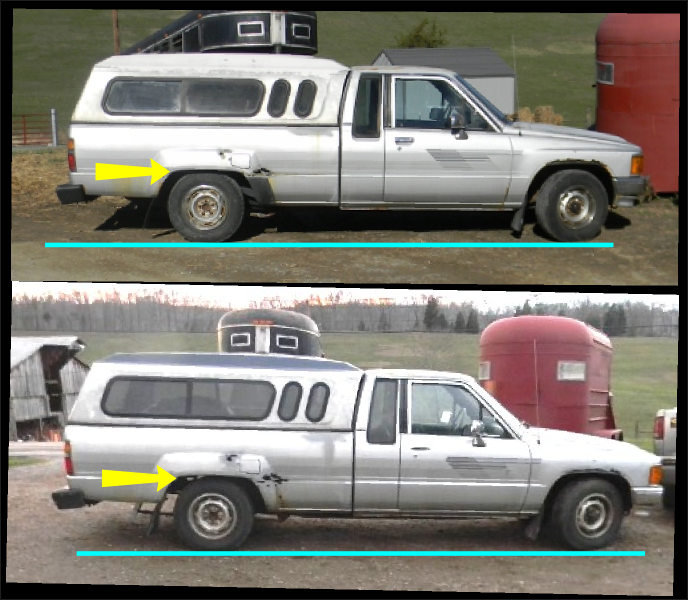
The 1987 Toyota desperately needs body work, there are rust holes that I can almost fit my hand through. But if there’s one thing I really dislike in an old truck, it’s to have the back end sagging so much that it looks lower than the front end. That’s just about how this truck was when I got it, so fixing that was appearance job #1.

I thought short of getting new leaf springs, the quickest way of doing the job would be shackles. They’re simple metal brackets that the truck already has, the new ones are longer, so it raises the truck up a little or a lot. I chose a little, when the tools are loaded, the difference isn’t much. The two pictures below were taken at slightly different places, that’s enough for the ground slope to distort what I did. The top (before) picture doesn’t really show how much it was sagging.

As for the work, the first side I took off was a LOT more difficult that the second side. The trick is to get a jack between the leaf spring and frame, in addition to the jacks used to lift the truck. this allows the bolt/pin parts to be aligned for easy removal. The difference being something like 3 hours vs. 15 minutes. Really. I also painted part of the roof a dull blue, to create a visual line that eliminates that dumb white domed up look.

Think about how the Lord Jesus restores a man; he doesn’t merely do the superficial. In the Bible, the book of Isaiah, chapter 28, it talks about learning Line upon line, precept upon precept; a little, and a little more. Read it for yourself, it’s amazing how something written thousands of years ago is still relevant.rakeAngle