
For years I’ve been interested in period paint formulas; since I do so many restorations and historical projects. In the last several months I’ve gotten very serious about researching the subject. I’ve made previous posts where I speculated that the primer I kept finding on old objects was iron oxide that turned tan colored with age. I’ve since realized that’s incorrect.
I was finding some information online, but not quite enough. If I added the word books to a search, it gave better results, this without quotation marks. One Friday afternoon, I remembered a book I had bought from an Amish harness maker years ago. It’s called The Carriage painter; it’s a large paperback book that contains issues of a periodical magazine form 1880. The book assumes that the reader knows the trade of painting, but it does describe some variations, and from that I got the names of their materials. They made a sandable primer they called “tough stuff”. Having that as a search term led to the breakthrough I needed in my internet search. I learned more in 3 hours than 3 months prior. I was very pleased.
I also have a book from 1916 on old paint formulas; I bought it from Lindsey Publications. You can see the cover of it in a picture below. It has taken a lot of experimenting to come up with no lead formulas using the ingredients available today. the experimenting continues, next week I should receive a bag of zinc oxide; which I will use as a filler for primer, and maybe as a metallic dryer. The ltest experiment was with asphaltum; I’ll probably describe the details of what I’ve found in future posts. Here are pictures from current activities.
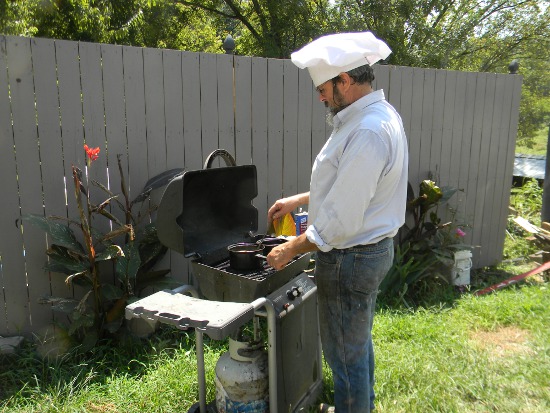 look, it’s Chef Le Varneesh, working with Damar resin in one pan, and asphalt in another. It’s urgent that you do this stuff outdoors, one mistake, and you’ll have flames coming out the top of your pan about 4 or 5 feet tall. The way to avoid following my lead on that one is to remove the pan from the fire before adding ingredients.
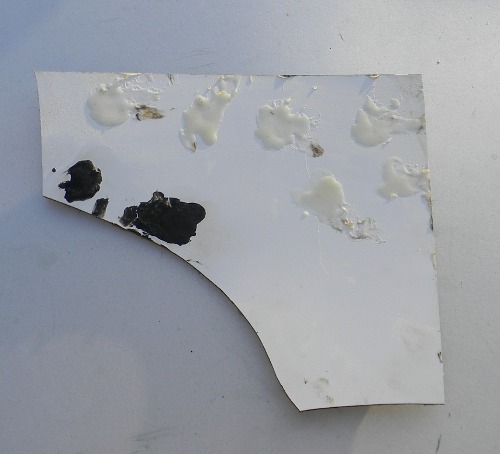
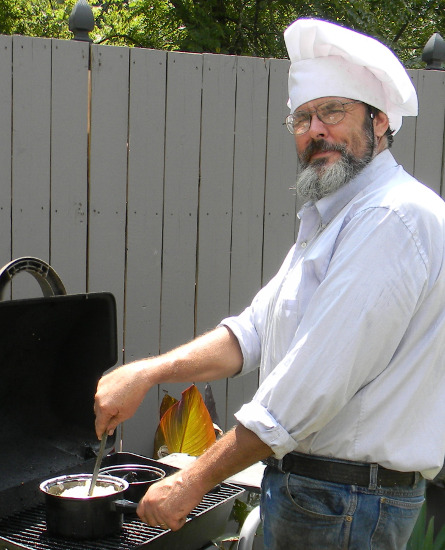 Below is a picture of Damar resin boiling in the left pan, asphalt in the right. They will be used for separate formulas. In the left pan I’ve already added some turpentine and linseed oil. I will also add lye and lime dissolved in water. That’s the part you have to be careful adding. I’ll post an exact formula later. One thing I’ll say now is that the Linseed oil isn’t a preset amount. I test the results as I’m boiling it. I keep adding a little linseed oil until I think it won’t return to a solid state when it cools. Below is a piece of aluminum I used for the test. The Damar is the clear spots along the top. The best formula I saw was online, by a violin maker. If I recall, he used equal parts LO and resin. I get more control over the things I make with the varnish when I reduce the amount of LO. Besides, it’s very easy to add it at any time.
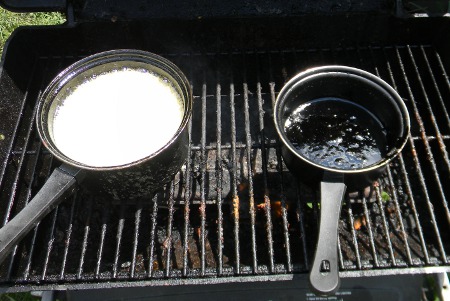
 Below is a picture from the bench where I was working with the paints and primers. The yellow tan primer is wet sanded with a pumice stone. At first, I used the usual modern method of having a few drops of dish dtergent in the water; but I’ve since found that rubbing bar soap on the surface is much better. It cuts the sanding time in half, because I don’t need to wait until the sanding builds up a slurry. Medium pressure is best, hard pressure on fresh primer is too destructive. I’ve been painting with oil based paints for 30 years, but these old formulas made me relearn some things. Like other site mixed paints, these need continual stirring. It actual works to my advantage to have a little separation of ingredients in the sandable primer. I’ve substituted calcium carbonate ( powdered marble) for the lead, and it settles down into the rsut pits nicely. What does happen though, is that the varnish can rise to the surface, and form somewhat of a seal, which makes drying slower. So wet sanding with the pumice stone is period correct, but also opens the surface up so that the primer can dry faster. It all works together, it will be interesting to try the zinc oxide.
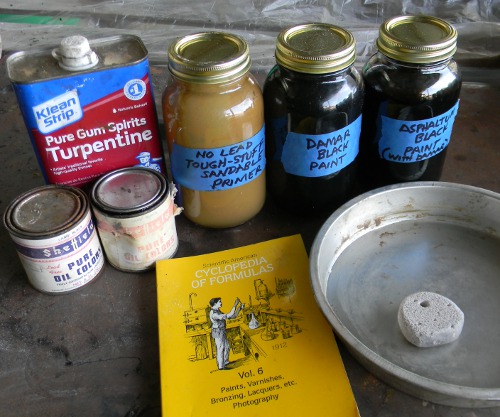 Below is a picture of a metal part that I’ve applied some body filler to, in the worst pits. The area near the holes will be covered by other parts bolted on, so I wasn’t concerned about filling those pits. The deadline is fast approaching on this job; and, the putty they used back then was mostly litharge, a from of oxidized lead, so I went with Bondo. You can see the yellow tan sandable primer partially wet sanded with a large pumice stone I bought at a pool supply store. The small ones you find in the foot health department are better. What the picture doesn’t show is how bad the scratches were in the primer. My method was bad, but the next step fixed it.
 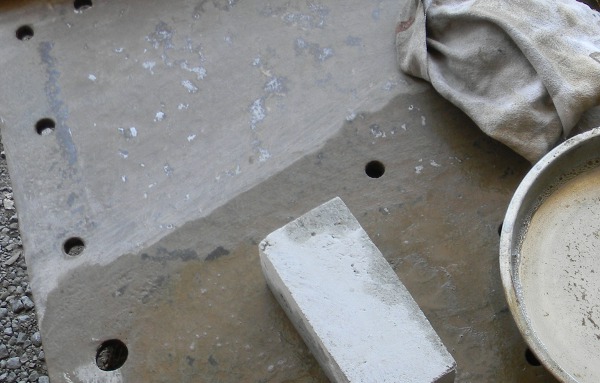 Next is a semi primer that I mixed using Damar gloss black paint mixed with sandable primer. I need to work on the portions; this is about one third gloss black, two thirds primer. They did this mix as a transition layer, but more on that later. The good thing is that the semi primer filled the huge scratches very well. These old formulas have some very pleasing properties. They handle differently, but man, the results. It might be that modern oil base paint starts with a liquid, that they chemically alter into a resin, then add other chemical to make it dry. The first liquid might be Soy bean oil. The paints I’m making start as a solid, which changes things quite a bit. here’s the semi primer that looks too black:
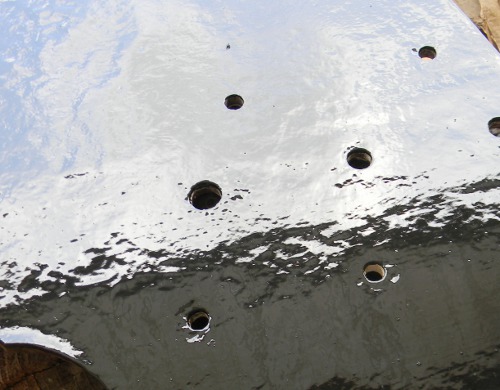
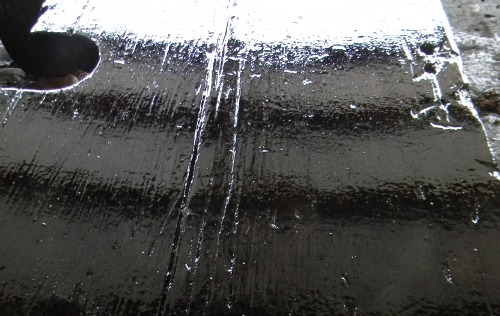
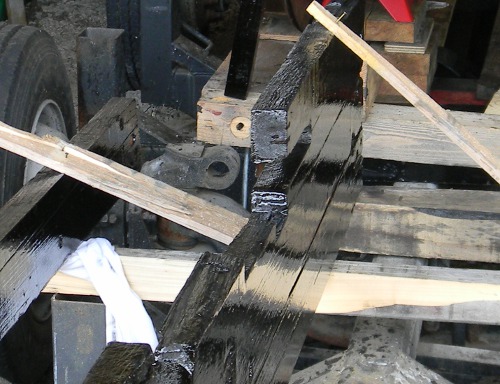
Below are three more pictures. The first is my first time using my gloss black oil based paint, made from Damar resin and lampbalck pigment. It’s actually black, what you’re seeing is the reflection of the metal roof of the building I’m in. The next picture is the same old walk plank, on the other side. I decided to paint the other side with a just finished asphaltum varnish formula. It’s asphaltum, with gloss black Damar paint mixed 50 – 50. I did it not only as an interesting experiment, but as an extender of my black paint. This paint goes on thicker, even when it doesn’t seem so. I end up applying a lot more, while using thae same methods I use on modern paint. Again, different working properties. The third picture shows two pieces of walk plank that I stood up with braces, to keep dust from settling on them while they dry. there’s a quarry operating nearby, and the dust isn’t nice to fresh black paint. The side you see is the asphaltum varnish side. The gloss of the Damar black is so good that it shows even when cut with an equal part of asphaltum. I need to learn more about asphaltum, but what I using that term for now is a mid density roof tar, boiled 15 minutes, with equal part of turpentine, and a little Japan dryer added after cooling.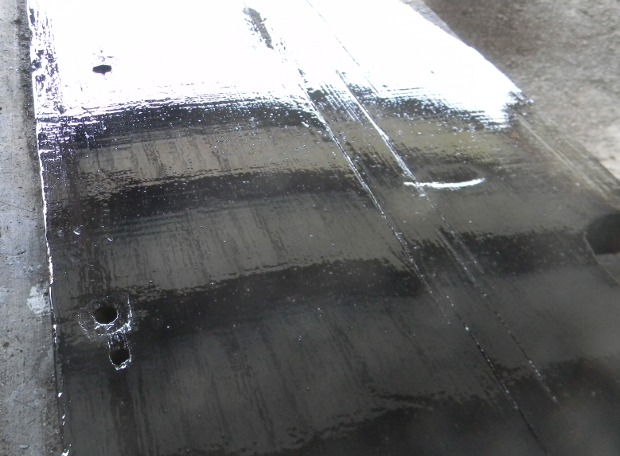
 Again, I’ve got more to write about the subject, but I’ll transcribe the formulas later.